


Potato Stamping
Supplies needed: potato, fabric paint, fabric, paper to go under fabric (I use freezer paper), old plastic lids for pouring your paint onto.

Let me tell you about some of the paints I've experimented with. These should be easily found at Joanns, Walmart, Hobby Lobby or Hancock fabrics. From left to right, Tulip Matte Soft fabric paint, I have found this to be one of the better fabric paints that is easily picked up at the store. It isn't as stiff when it dries and stays colorfast even through a lot of laundering. The second bottle is Tulip Matte Dimensional fabric paint and I think you probably should recognize this from the 80's. Its kinda like the puffy paint you made so many t-shirts with in the late 80's- that is unless you weren't born yet or were still in diapers. It stands up from the fabric and is not ideal for stamping. It also dries very stiff. As far as laundering goes, it's color fast and adheres well but isn't the best for the purposes of stamping. The third and fourth bottles are another form of the Tulip Matte Soft fabric paint and I picked them up from Walmart in a kit. So they have the same qualities as the first paint I mentioned. The fifth and sixth bottles are Jacquard screen inks. They work the best with screens but I have used them with some success in stamping. They are much thicker than the Tulip fabric paint so the result is a little more stiff. Overall I'd say that the Tulip Matte Soft fabric paint is your best bet.
Ok, enough of paints, lets start potato stamping!

1. Cut your potato in half down the middle and lay it on a piece of paper. Trace around potato so that you can know the amount of space you will have for your design.

2. Lift up potato and draw design, I chose a simple cat silhouette. Simple shapes usually stamp better than complicated ones. Cut out drawn design from paper and lay on top of cut potato.

3. Trace design onto potato with pencil and then cut surrounding potato away from design about 1/4" deep.

4. Now you have your stamp. Dab stamp in fabric paint and start stamping your fabric.

5. Follow the instructions for letting the paint dry and then your fabric is ready for sewing!

Foam Stamping
Supplies: Foam sheets, fabric paint, fabric for stamping, paint brush for touch-ups, paper to keep paint from seeping through fabric, old plastic lids for the paint, something to mount the shape on like the back of an old stamp or very thick cardboard, craft glue.
1. Draw figure to stamp on foam sheet. I used the silhouette of a cat, dog, and flower (my children are really into cats and dogs right now). Cut out shape and glue to wooden block, back of an old stamp block or thick cardboard. Below are both examples. The flower foam is glued on the back of a stamp block that I never use.

The dog and cat silhouettes are mounted on a few layers of cardboard glued together. In the second picture I'm showing you the layers glued together. To do this just cut out a few squares the same size from scrap cardboard, put glue between the layers and a rubber band around them. Let them dry for a day and then mount your foam shape to it.


3. Dip foam stamp in fabric paint and stamp away. A brayer might be helpful here but I just use a finger to smooth the paint on the stamp if it looks like its going on very uneven.

4. After you are done stamping your fabric you may need to touch up your images with a little paint and a paint brush. You can see the cat images below need some touch-ups.

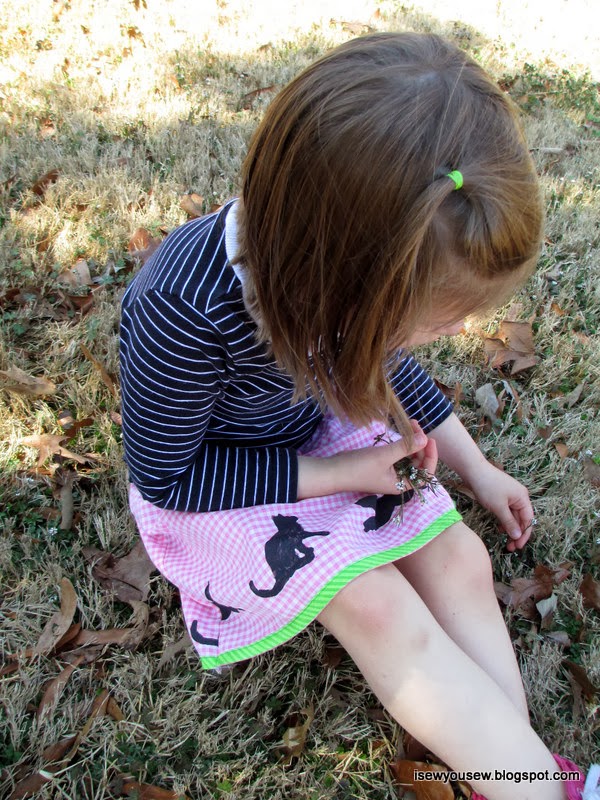
5. Follow the drying instructions on your paint and your done! Now get sewing! I used the cat fabric to make this child's skirt. Its for a special friend that just turned 3!

Thanks for reading and if you stamp fabric using this tutorial we'd love to see it in our flickr pool! Also for an example of how these techniques can be applied to an adult garment check out this post.
Linking up to Frontier Dreams, Keep Calm and Craft on and Sew Much Ado: We did it Wednesday.
So cute..
ReplyDelete